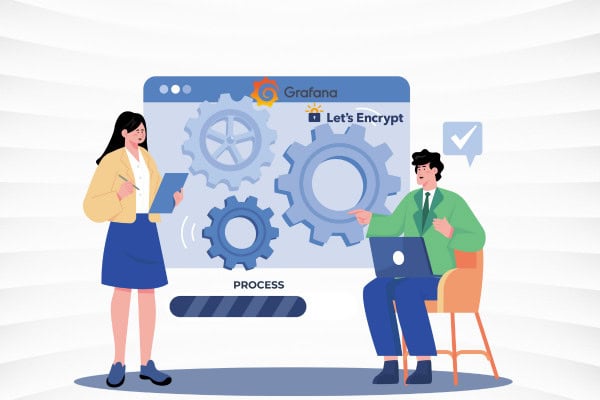
Enable HTTPS in Grafana Using Let's Encrypt SSL Certificates - Overview
To enable HTTPS in Grafana with Let's Encrypt, you’ll first install Certbot, use it to generate a certificate, then stop the Grafana server so that you can modify the configuration file to use the HTTPS protocol. Finally you’ll restart the service to apply changes. The entire process takes about 10 minutes and provides immediate protection with automatic certificate renewal.Why Secure Your Grafana Dashboard with HTTPS?
When accessing Grafana through the web, unencrypted HTTP connections expose sensitive information including:- Login credentials
- API keys
- Visualization data and metrics
Prerequisites for Installing Let's Encrypt on Grafana
Before you proceed with installing Let's Encrypt, you'll need:- A domain name. You can purchase one directly from your SSD Nodes dashboard, where you will be able to manage it efficiently.
- Grafana installed on your VPS.
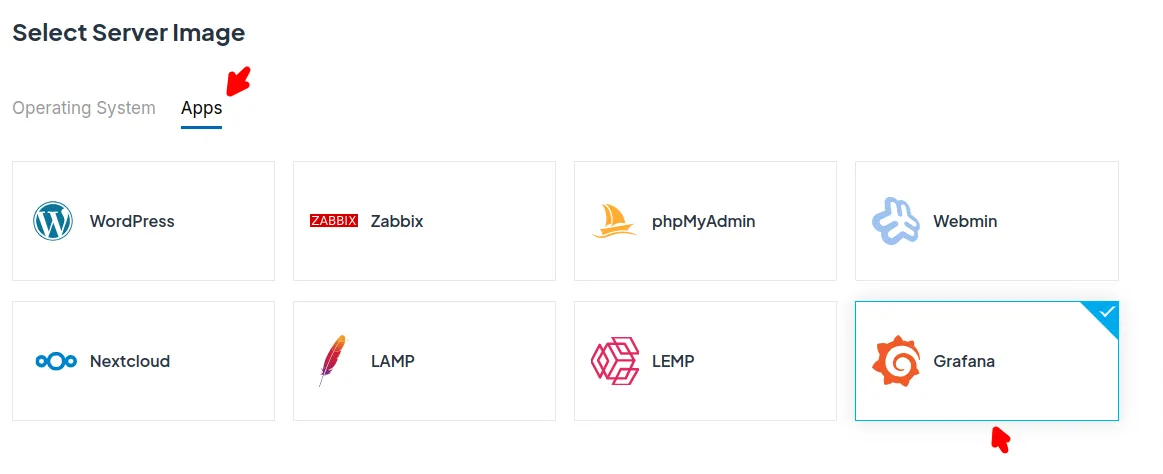
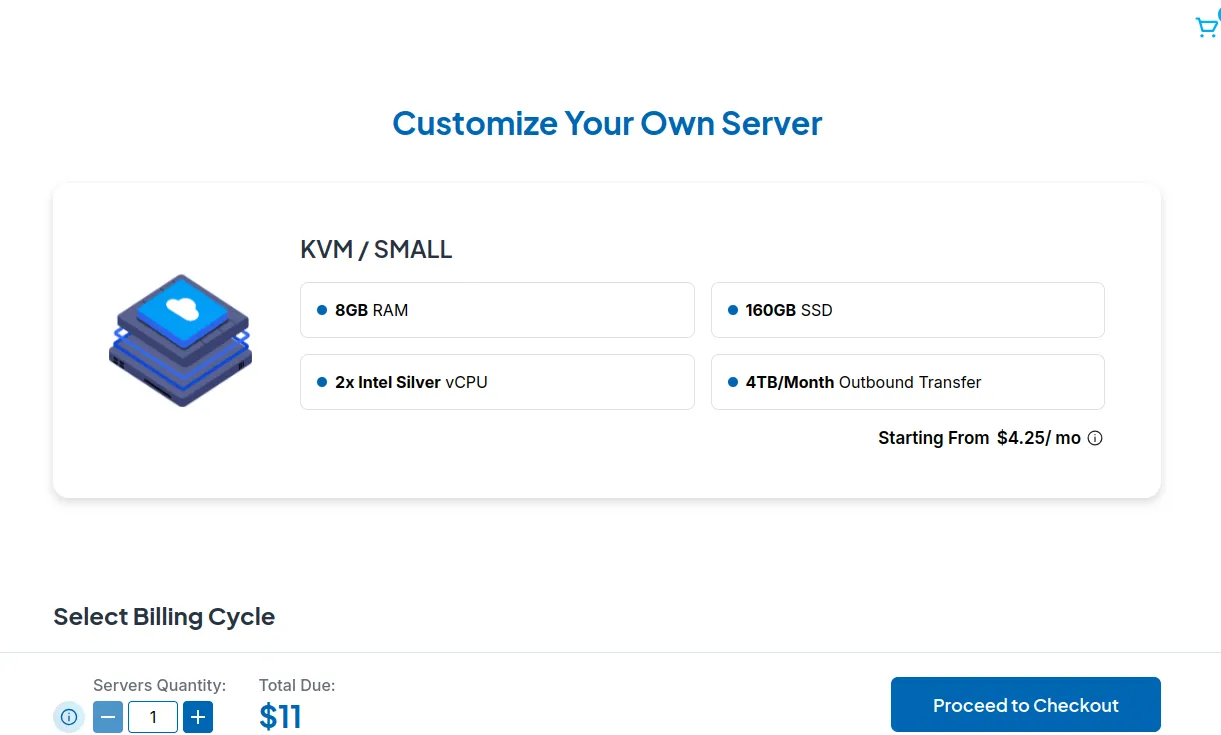 Select a suitable location from our 14 locations worldwide, then under Select Server Image = > Apps, choose Grafana, then proceed to checkout:
 And congratulations! You'll have Grafana installed on your VPS in less than 5 minutes.
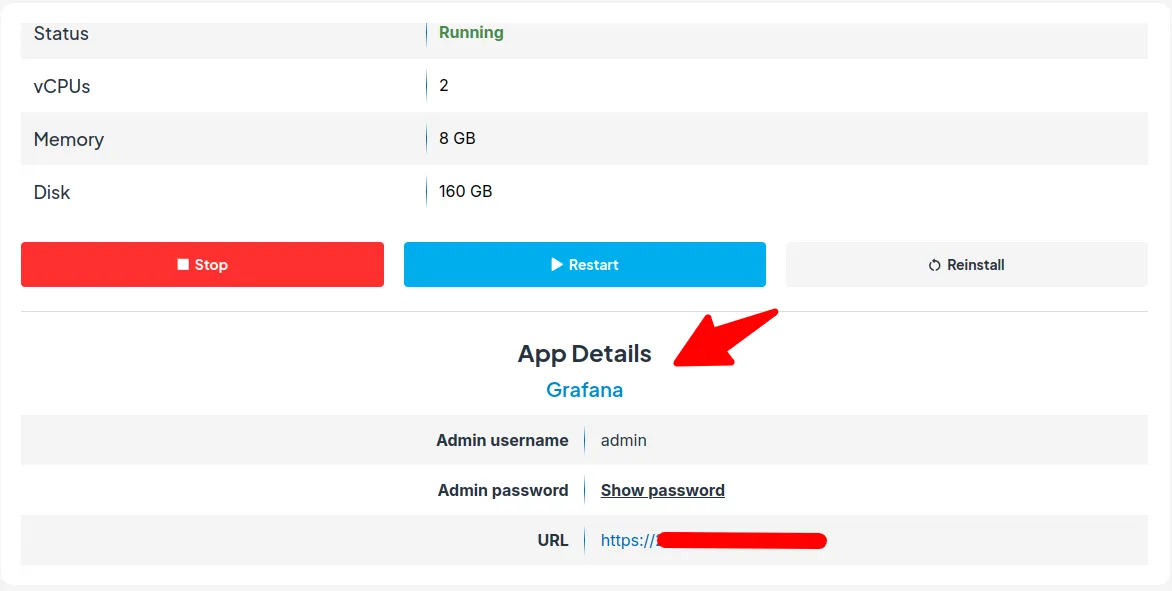
To access Grafana, use the URL in the App Details section in your SSD Nodes dashboard:
And congratulations! You'll have Grafana installed on your VPS in less than 5 minutes.
To access Grafana, use the URL in the App Details section in your SSD Nodes dashboard:
Deploy Your Grafana VPS With Us And Save $5000+ Did you know that we are the most affordable VPS provider in the market? You can save up to $5000 with us over three years. Check out the SSD Nodes hosting pricing page, and stop overpaying for your VPS.
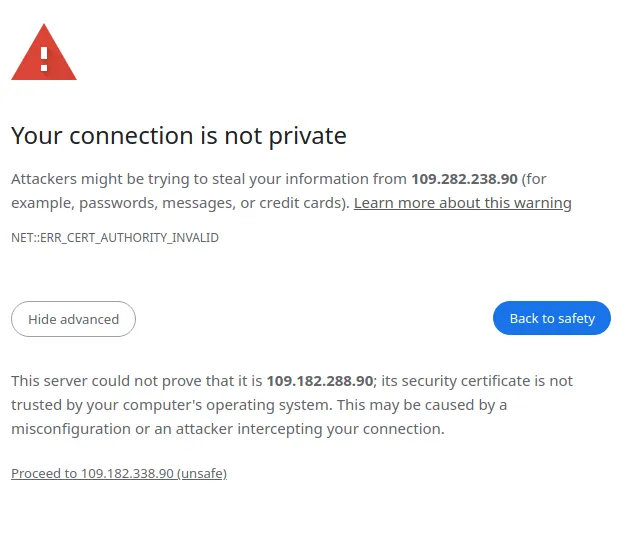
When you first access Grafana, your browser will show a security warning because Grafana uses a self-signed SSL certificate by default. We'll fix this warning by installing a trusted Let's Encrypt certificate in the next steps. For now, just click "Advanced" or "More Information" in your browser, then "Proceed" to continue to the login page:
 Once you proceed, you'll have access to the Grafana login page:
 With Grafana now installed on your VPS, you can move on to installing Let's Encrypt on it
Continue reading this article
by subscribing to our newsletter.
Subscribe nowby subscribing to our newsletter.
A note about tutorials: We encourage our users to try out tutorials, but they aren't fully supported by our team—we can't always provide support when things go wrong. Be sure to check which OS and version it was tested with before you proceed.
If you want a fully managed experience, with dedicated support for any application you might want to run, contact us for more information.