
Installing Let's Encrypt on Ubuntu may sound a bit daunting at first, but it's actually pretty easy! Thanks to Certbot, you can quickly install a Let's Encrypt certificate and use it on your Apache and Nginx web servers to secure traffic with SSL/TLS encryption.
In this article, you'll learn how to install Certbot on Ubuntu 24.04, and use it to install Let's Encrypt certificates and configure them for both Apache and Nginx to use HTTPS instead of HTTP.

Quick-Start Guide: Install Certbot on Ubuntu 24.04
If you're looking for the fastest way to install Certbot and set up Let's Encrypt on Ubuntu 24.04, here are the essential commands:
# Update packages and install Certbot
sudo apt update
sudo apt install -y certbot

# For Apache users
sudo apt install -y python3-certbot-apache
sudo certbot --apache -d example.com

# For Nginx users
sudo apt install -y python3-certbot-nginx
sudo certbot --nginx -d example.com
For detailed instructions, including manual installation and configuration options, continue reading below.
Prerequisites
- To follow this tutorial, you'll need an Ubuntu 24.04 server with sudo privileges. If you haven't noticed, we offer the most affordable and reliable Ubuntu servers in the world. Our NVMe VPS options provide lightning-fast performance for your SSL-secured websites.
Step 1: Install Certbot on Ubuntu 24.04
To install Certbot on Ubuntu 24.04, you'll first need to update your package repositories to ensure you're installing the latest version. Updating your package list refreshes your system's knowledge of available software and their versions, which is an essential first step before installing any new application:
sudo apt update
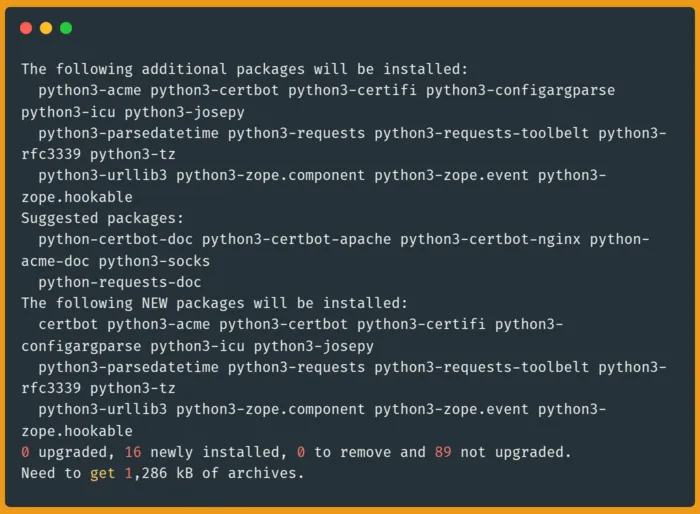
Next, use the apt command to install certbot:
sudo apt install -y certbotThe Certbot command line tool will automate the process of getting and installing a Let's Encrypt certificate that you can use with Apache and Nginx servers, valid for 90 days, with the possibility of an automated renewal.
Note
Before proceeding with certificate installation, ensure that TCP ports 80 (HTTP) and 443 (HTTPS) are open on your server's firewall. These ports are essential for the Let's Encrypt validation process - port 80 allows the initial domain verification challenge to complete successfully, while port 443 is needed for serving encrypted HTTPS traffic once your certificate is installed.
Step 2: Install a Let’s Encrypt Certificate Using Certbot
To create a Let’s Encrypt certificate with certbot on Ubuntu, you’ll use the following command structure:
sudo certbot certonly --webroot --webroot-path WEB_SERVER_ROOT_PATH -m EMAIL -d DOMAIN --agree-tos -nHere is what each part of the preceding command means:
certonly: (certificate only) used to just obtain the certificate without installing it anywhere.--webroot: An option that is used here to keep the web server running while Certbot runs, since we’re already running a local web server, and don't want to stop it during the certificate issuance process.--webroot-pathor-w: Defines the top-level directory (“web root”) containing the files served by your webserver. Note that the web root path must be the path on which files from the domain are served. In our example, it's the web root path from which ourhttp://www.example.comURL serves files.--mailor-m: The email which will be used by the certificate authority to alert you when a domain will expire.--domainor-d: The domain name you’ll use to access the server by.--agree-tos: Confirms our agreement to the ACME server's subscriber agreement.--non-interactiveor-nis used to execute the command without ever asking for user input or prompts.
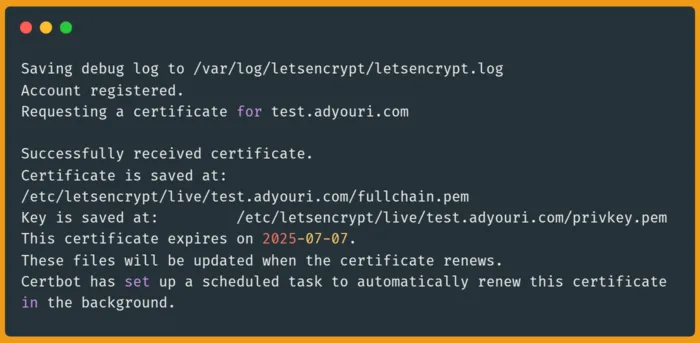
Now that you are familiar with the certbot options and actions, you can form and execute a certbot command to create a certificate. For example, you can use the following command, making sure to set the appropriate values for your case:
sudo certbot certonly --webroot --webroot-path /var/www/html/ -m [email protected] -d www.example.com --agree-tos -nOnce the command is executed, the following two files will be automatically created under the respective subdirectories as follows:
- The private key:
/etc/letsencrypt/live/www.example.com/privkey.pem - The certificate:
/etc/letsencrypt/live/www.example.com/fullchain.pem
Now that you have your Let's Encrypt private key file and your certificate file, you can install your certificate on your web server.
"Only Domain Names Are Supported, Not IP Addresses" Certbot Error
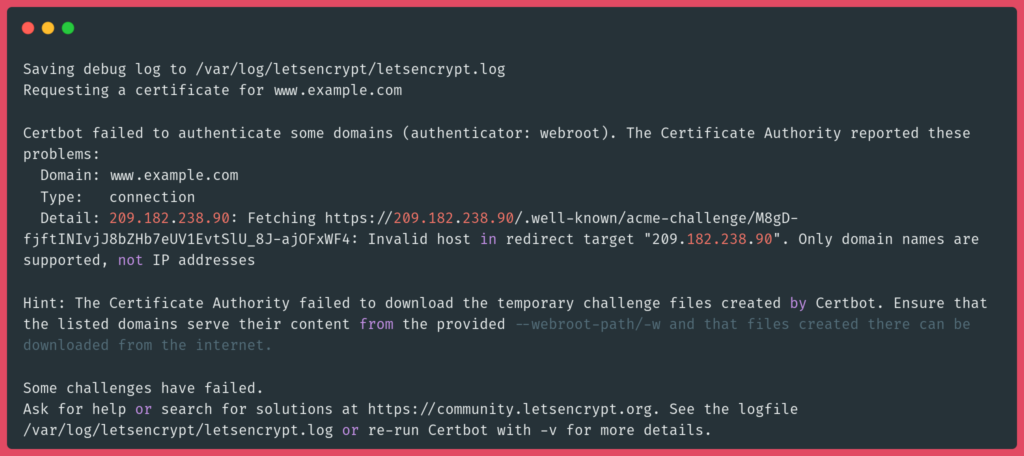
The "Only domain names are supported, not IP addresses" error in Certbot occurs because Let’s Encrypt does not issue SSL certificates for IP addresses. Certificates are only provided for fully qualified domain names (FQDNs). To resolve this, ensure you are using a valid domain name instead of an IP address when requesting a certificate. Register a domain if needed.
Step 3: Configuring Apache with Let's Encrypt Certificates

Now that you’ve created a Let’s Encrypt certificate, you can configure your Apache server to use it and enable HTTPS on your website.
First, you'll need to modify Apache's default configuration file to integrate your newly acquired Let's Encrypt SSL certificate. This configuration file controls how Apache handles incoming requests and determines which virtual hosts use HTTPS encryption:
sudo nano /etc/apache2/sites-enabled/000-default.confMake sure you set up a domain, and then replace the key and the certificate paths with the Let’s Encrypt private key file and the certificate file (the changes you have to make are highlighted in yellow in the code below):
<VirtualHost *:80>
        Define servername www.example.com
        ServerName ${SERVERNAME}
        RewriteEngine on
        RewriteRule ^/.*$ https://\${SERVERNAME}%{SCRIPT_FILENAME}?%{QUERY_STRING} [R=301]
        ErrorLog ${APACHE_LOG_DIR}/error.log
        CustomLog ${APACHE_LOG_DIR}/access.log combined
</VirtualHost>
<VirtualHost *:443>
        SSLEngine On
        SSLCertificateFile /etc/letsencrypt/live/www.example.com/fullchain.pem
        SSLCertificateKeyFile /etc/letsencrypt/live/www.example.com/privkey.pem
        ServerName ${SERVERNAME}
        DocumentRoot /var/www/html
        ErrorLog ${APACHE_LOG_DIR}/error.log
        CustomLog ${APACHE_LOG_DIR}/access.log combined
</VirtualHost>
Here, you set the SSLCertificateFile directive to the path of the Let’s Encrypt certificate file, and you set the SSLCertificateKeyFile directive to the private key’s path.
Next, test for configuration errors:
sudo apache2ctl configtestYou should receive an output that contains the text Syntax OK, which means you can safely reload Apache, otherwise, you will get a very specific description pointing out the error you have to fix.
Next, restart Apache:
sudo systemctl restart apache2Now, reload your website in the browser. You will notice a secured padlock with a valid certificate message as you can see in the following example, which was taken from the Google Chrome browser:
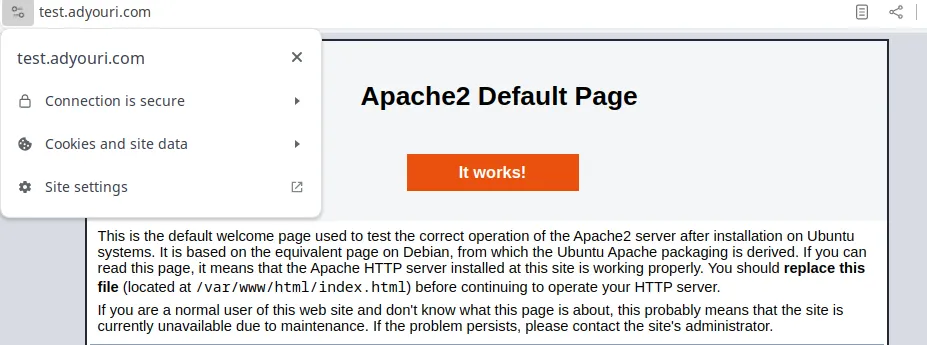
With this, you now have HTTPS enabled in your Apache web server, and you can now secure your web traffic, which establishes customer trust and protects both your internal and public data.
Step 3.2: Configuring Nginx with Let's Encrypt Certificates

To configure your Let’s Encrypt certificate with your NGINX server and enable HTTPS on your website. First, edit NGINX’s default configuration file:
sudo nano /etc/nginx/sites-enabled/defaultSet up your domain name. Then replace the private key and the certificate paths with the Let’s Encrypt private key file and the certificate file generated by Certbot (the changes you have to make are highlighted in yellow in the code below):
server {
   listen 80;
   listen [::]:80;
   server_name www.example.com;
   access_log off;
   location / {
         rewrite ^ https://$host$request_uri? permanent;
   }
}

server {
    listen 443 ssl;
    listen [::]:443 ssl;
    server_name www.example.com;
    root /var/www/html;
    index index.php index.html index.htm index.nginx-debian.html;
    autoindex off;
    ssl_certificate /etc/letsencrypt/live/www.example.com/fullchain.pem;
    ssl_certificate_key /etc/letsencrypt/live/www.example.com/privkey.pem;
    ssl_protocols TLSv1 TLSv1.1 TLSv1.2;
    ssl_ciphers HIGH:!aNULL:!MD5;

    location ~ \.php$ {
         include snippets/fastcgi-php.conf;
         fastcgi_pass unix:/var/run/php/php-fpm.sock;
         fastcgi_param SCRIPT_FILENAME $document_root$fastcgi_script_name;
         include fastcgi_params;
    }
}
Here, you set the ssl_certificate directive to the Let’s Encrypt certificate file path you created earlier, and the ssl_certificate_key directive to the Let’s Encrypt private key file path.
With the configuration file modified, check for syntax errors in it using the following command:
sudo nginx -tThe output should let you know that the configuration file test is successful.
Now, restart NGINX:
sudo systemctl restart nginxReload your browser and you will notice a secured padlock with a valid certificate message.
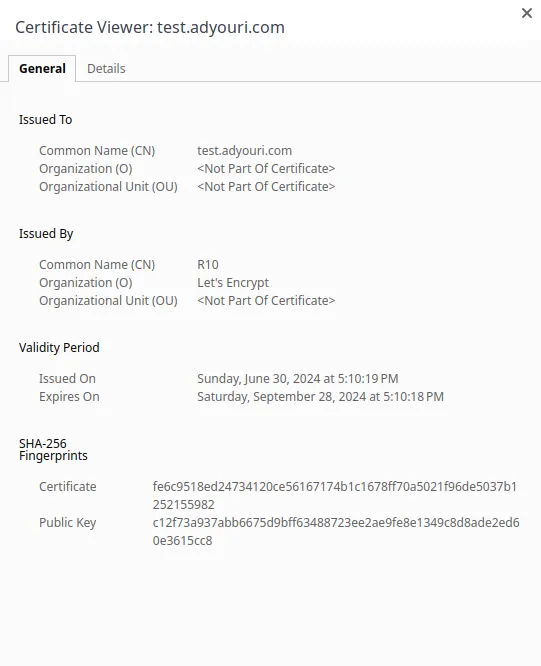
Step 4: Verifying Your Let's Encrypt Certificate Information
In the pop-up that comes up when clicking the padlock or settings icon on the left side of the URL, click on "Certificate is secure" or "Connection is Secure" depending on your browser. This will give you detailed information on the CA certificate:
Congrats!
Your Ubuntu server's Apache or Nginx web server has become CA certified with Let's Encrypt, and you can now securely transfer data through HTTPS, and protect your online transactions, and with best security practices, you can handle paid subscriptions, eCommerce orders, memberships, or charity and online fundraising.
Installing a non-Let's-Encrypt CA Certificates
If you are looking to install a non-Let's-Encrypt CA Certificate you'll generally need to do the following:
1) Creating a Certificate Signing Request (CSR)
The CSR contains information (e.g. common name, organization, country) which the Certificate Authority (CA) will use to create your certificate. You generate it on the server where you want to install the certificate. It includes the public key that will be part of your certificate, and is signed with the corresponding private key.
Check out How to Create a Self-Signed Certificate, which describes CSR creation for self-signed certificates (which also applies to CA certificates).
2) Uploading the CSR to the Certificate Authority (CA)
Please refer to the documentation of the certificate authority of your choice, and follow their instructions to properly upload your certificate signing request, along with any additional information.
Once the CSR is uploaded, the CA replies with your final certificate ready to use.
FAQ
What are the differences between Let's Encrypt Certificates vs Paid TLS/SSL Certificates?
Although Let's Encrypt provides free SSL certificates. Paid TLS/SSL certificates often give you additional features such as extended validation and warranty. These paid TLS/SSL certificates are usually suitable for businesses needing higher trust levels. Both types of certificates encrypt data, but paid SSLs often come with better customer support and additional security features. If you have a business, it is better to use a paid certificate. To get affordable TLS/SSL certificates, check out our website.
Is Let's Encrypt safe?
Yes, Let's Encrypt is safe. It provides the same level of encryption as paid SSL certificates. It is backed by major tech companies and regularly audited for security. Automatic renewals ensure your site stays secure. However, it lacks some advanced features offered by paid certificates. For most websites, Let's Encrypt is a reliable and secure option.
What to do when Let's Encrypt Root Certificate is expiring?
Let's Encrypt's root certificate expiration is a known issue. Ensure your systems are updated to trust the new root certificate. Older devices might face connectivity issues. Regularly check for updates and ensure compatibility with new certificates. This change is a normal part of maintaining secure encryption. Proper updates will keep your site secure and trusted.
How to perform Let's Encrypt renewals with Certbot?
Renewing Let's Encrypt certificates with Certbot is straightforward. Certbot automatically handles renewals for you. By default, it checks for renewal every day and renews certificates that are within 30 days of expiring. Ensure your server is configured to allow automatic renewals. Manual renewal can be done if needed, but automation is recommended for continuous security.
Does Let's Encrypt offer Wildcard Certificates?
Let's Encrypt offers wildcard certificates, securing multiple subdomains under a single domain. This simplifies certificate management. To obtain a wildcard certificate, use DNS-based domain validation. Ensure your DNS provider supports the necessary API calls. Wildcard certificates are beneficial for sites with numerous subdomains, reducing the need for separate certificates for each one.
A note about tutorials: We encourage our users to try out tutorials, but they aren't fully supported by our team—we can't always provide support when things go wrong. Be sure to check which OS and version it was tested with before you proceed.
If you want a fully managed experience, with dedicated support for any application you might want to run, contact us for more information.